Adding Persistence to a Kali Linux “Live” USB Drive
Kali Linux “Live” has two options in the default boot menu which enable persistence — the preservation of data on the “Kali Live” USB drive — across reboots of “Kali Live”. This can be an extremely useful enhancement, and enables you to retain documents, collected testing results, configurations, etc., when running Kali Linux “Live” from the USB drive, even across different systems. The persistent data is stored in its own partition on the USB drive, which can also be optionally LUKS-encrypted.
To make use of the USB persistence options at boot time, you’ll need to do some additional setup on your “Kali Linux Live” USB drive; this article will show you how.
This guide assumes that you have already created a Kali Linux “Live” USB drive as described inthe section on that subject. For the purposes of this article, we’ll assume you’re working on a Linux-based system.
Installing Kali | How to Install Kali Live on a USB Drive With Persistence
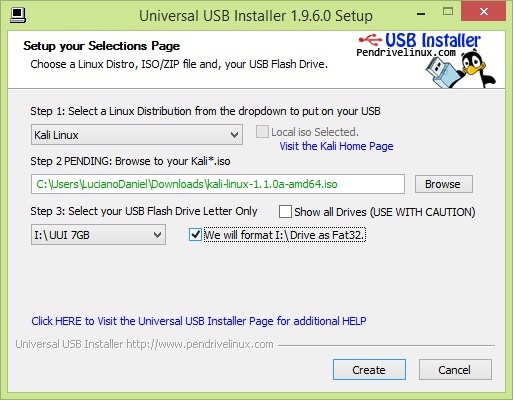
And then choose the drive letter for your USB drive (you probably won't need to use that checkbox on the right side). Be careful when doing this.
I'd recommend to check the box that formats your USB drive. That'll wipe your whole USB drive, make sure you back up everything you had there before proceeding. It'll make a quick format, so there's no reason to avoid this.
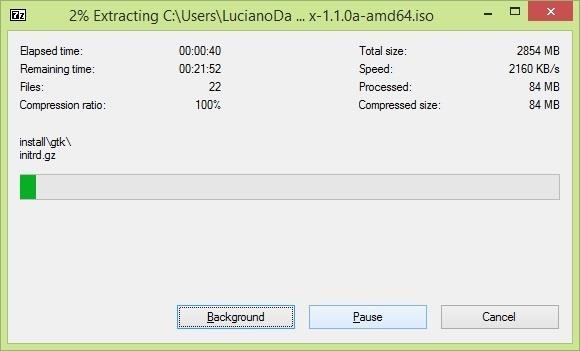
Click on Create, then Yes, and it'll do the whole process by itself. The longest part will be extracting the ISO to your USB, but it'll be over in a matter of minutes.
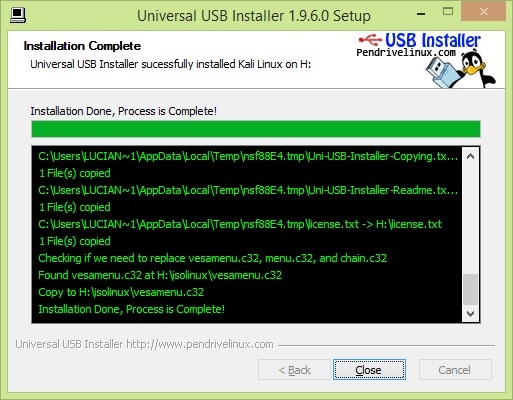
If everything went as expected, you'll see this, and you have a USB you can Live boot you Kali from. You may have to do a little tweaking on your BIOS for it to work, but I don't know how to cover every BIOS on a single tutorial.
Quick Linux Guide | How to Install Kali Live on a USB Drive With Persistence
If you're already a Linux user, follow these steps to make a Kali Live USB. It's way simpler and faster than Windows!
· Make sure you have a 4 GB+ USB drive connected and you're ready to get it cleaned.
· Download the Kali ISO of your choice (32/64 bit).
· Check your USB drive location with sudo fdisk -l
· Let's say it's /dev/sdb and you haven't ever partitioned it. Just format it to be Fat32 with sudo mkfs.vfat -n 'Kali' -I /dev/sdb1
· Locate your Kali image and use it as input in this command: sudo dd if=/home/you/downloads/kali.version.iso of=/dev/sdb1 bs=512
Wait for it to finish, and that's it, you have Kali on your USB drive now.
Setting Up Persistence (Preparing the Partition) | How to Install Kali Live on a USB Drive With Persistence
You liked to Live boot from USB, but you want to save changes made into your OS, or just files (such as .pcap files) into your USB drive? You'll need to set up Persistence. Your USB drive must have 8 GB+ of storage space.
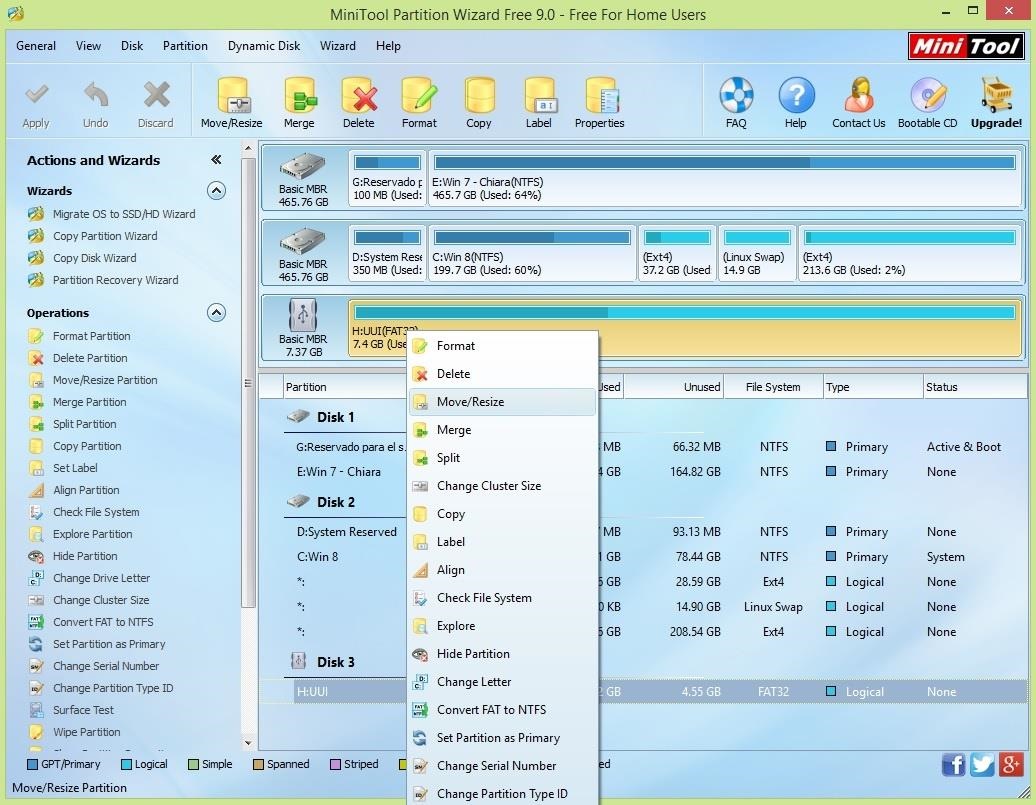
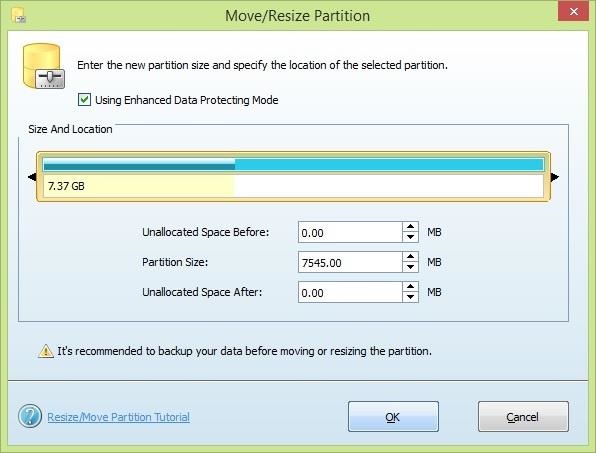
Right click on your USB drive, and click on Move/Resize
Use the small black arrow keys to shrink the partition size. It will leave a bit of storage space free, but if you manually assign the Partition Size, the program may fail. Click OK.
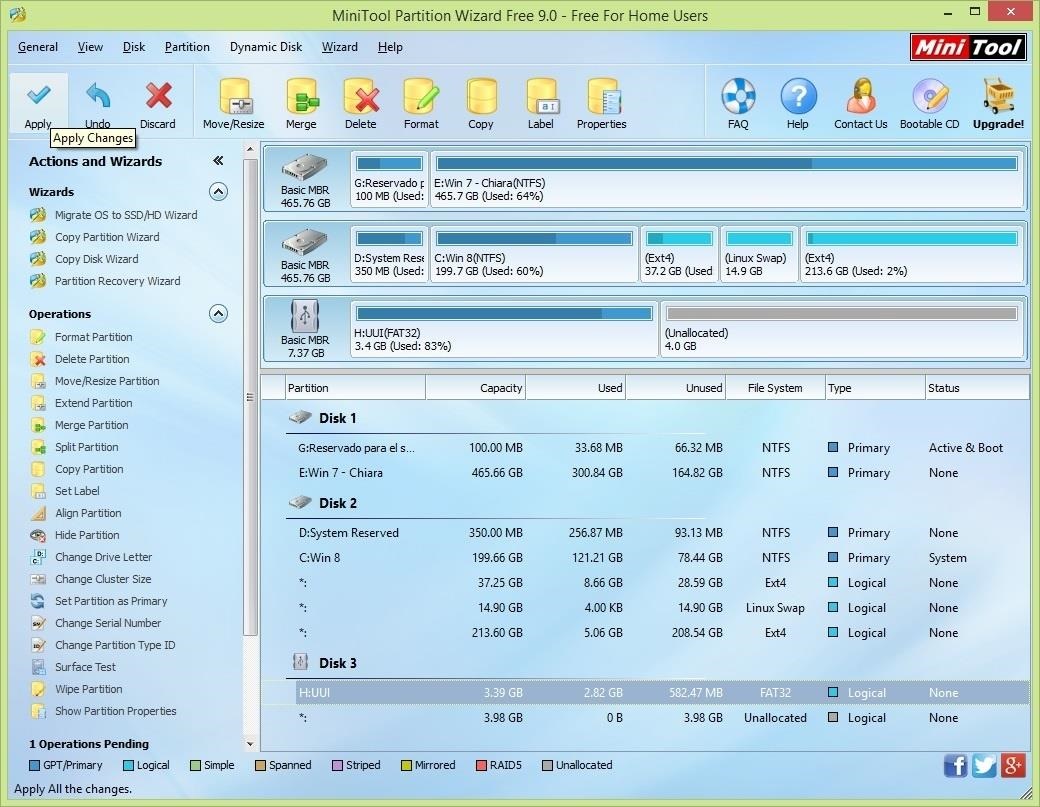
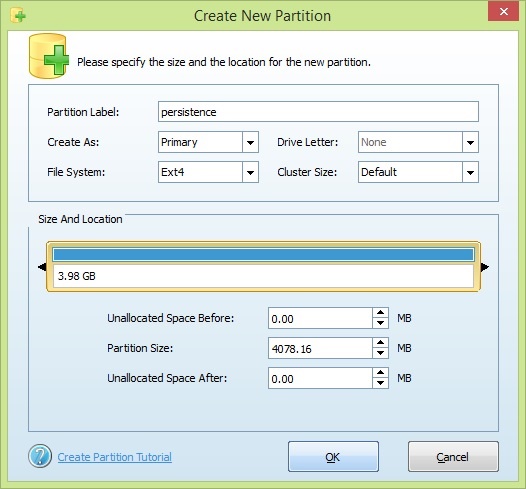
A new big grey chunk of unallocated space as appeared! Right click on it and click on Create. It'll warn us that Windows won't be able to see that partition, but we don't care about that ;)
Now click on Apply (upper left corner), and just wait for it to complete the tasks.
Setting Up Persistence (Configuring the Partition) | How to Install Kali Live on a USB Drive With Persistence
Once the partition manager finished, reboot your computer and boot up from your USB drive. Choose the option "Live USB Persistence", and when it's booted up, open a Terminal and use these commands:
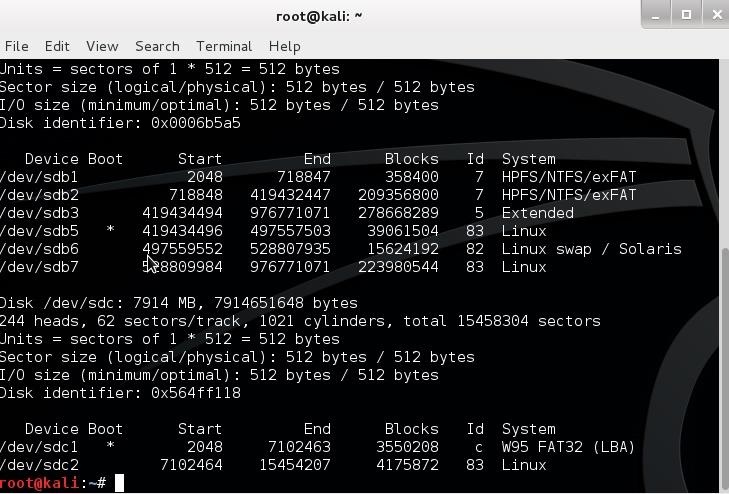
Determine which partition of your drive you'll use fdisk -l
Remember your drive had a FAT32 partition and a Ext4 (Linux) one?
Make a directory on the filesystem to mount your USB mkdir -p /mnt/my_usb
Mount the partition on the directory you made (don't click the desktop icon labeled persistence!) mount /dev/sdc2 /mnt/my_usb
Add a configuration file to enable persistence echo "/ union" > /mnt/my_usb/persistence.conf
Unmount the partition and reboot umount /dev/sdc2 && reboot
Now, if you boot up to Live USB Persistence, you'll be able to save stuff everywhere on your Linux filesystem, and every configuration you make locally will be available everywhere you plug it in :)
Closing Up | How to Install Kali Live on a USB Drive With Persistence
I hope this article is useful for newbies who are getting their heads messed up with VMs instead of just booting up Kali and getting their heads messed up by using Kali.
I also hope it's not over explained (or under explained). I've tried to keep it as simple as I could without adding loads of screenies as if it were going to be read by dumb people. But I'll gladly answer any questions related to this in the comments :)
P.S.: Sorry Mac users, I don't know about your system. Yet.
P.S.2.: I'll do a Linux partition guide when I figure out how much space I can crop without screwing up my drive, but you can have fun with GParted in the meantime.


EmoticonEmoticon